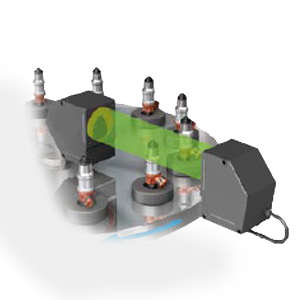
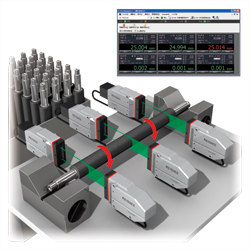
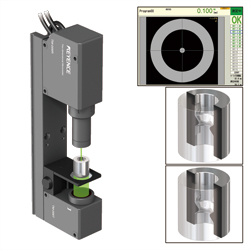
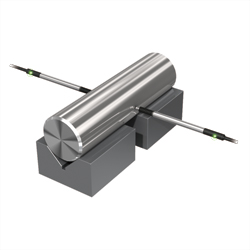
These sensors measure the outer diameter of the cylindrical object. In addition to measuring from one axis, it is possible to measure with two or more axes. Measurement of internal diameters is performed in two ways: with thrubeam sensor and with contact type sensor.
Outer / inner diameter measurement
1D optical Thrubeam methode
Green LED light is emitted as a uniform collimated beam. When a target breaks this beam a shadow is formed on the light receiving element, measuring this shadow gives us an accurate representation of the target.
- Stable measurement with extremely high precision
- Quick, contactless measurement
- It is possible to measure transparent objects
- Precise measurement of parts that vibrate or are not in the same level
Examples of applications:
- Measurement of total width and angle on springs
- Measurement of the outer diameter and angle of the top of the valve
- Measurement of the outer diameter and angle of the tip of medical needles for syringes
- Measurement of the diameter and height of the lens
- Measurement of the maximum and minimum ampoule diameter
- Measuring threads on PET bottles
- Measurement of the diameter O of the seal
2D optical Thrubeam methode
The optical system using a Green LED, and telecentric lenses apply uniform LED light onto the target.
This light projects an image on the 2D CMOS and the edges between the light and dark areas are detected to allow measurement at multiple points. Moreover, the motor-less structure and longer life light source provide high durability.
- Measurement is possible at multiple points simultaneously
- High stability
Examples of applications:
- Measurement of total width and angle on springs
- Measurement of the outer diameter and angle of the top of the valve
- Measurement of the outer diameter and angle of the tip of medical needles for syringes
- Measurement of the diameter and height of the lens
- Measurement of the maximum and minimum ampoule diameter
- Measuring threads on PET bottles
- Measurement of the diameter O of the seal
Contact-Type
Outer diameter measurements are performed using two sensors. The contact-type system allows for highly accurate measurement.
- Target selection only determined by solidity
- High-precision measurement possible
Application examples:
- In automotive industry for measuring external / internal diameter of the components, inspection of discs, loss on camshafts, checking the engine block or oil tank
- In metalworking industry for checking the completeness of bearings, dimensional measurement during metal processing
- For electronic components, checking the flatness of the battery, checking the base of the smartphone, checking the completeness of motherboards, hard drives etc.
- Measurement of thickness / height / flatness of semiconductor and liquid crystals
- In food industry, checking duplicated labels / labels, product overload etc.


